
Navigate to Tools > All tools
Introduction
Custom Tools are tools that help you resolve issues, perform actions, or gather information. They open the door to increased functionality for System Frontier. You can run almost any script on servers, workstations, users, or network devices with the same role-based security found throughout System Frontier.
Managing Custom Tools
When you navigate to the Tools menu, you will see a link to create a tool and a link for all tools. The Custom Tools page is displayed by default:

Clicking the All tools link also opens the Custom Tools page, where you can run or edit existing Custom Tools. The Create tool link takes you to the Custom Tool (Insert) page where you can create a new Custom Tool. The third link in the Tools menu is called My Jobs and its page displays data and results from previous runs of individual Custom Tools.
A Custom Tool uses a script that you provide. System Frontier runs the script with a multi-threading job engine on the management server.
Supported script languages are:
- PowerShell
- Batch
- VBScript
- Python
- SSH Shell
- other command line script utilities
The Custom Tool Script
You can use existing scripts that your organization has already developed. Review the Custom Tool creation steps in this document to get it ready for use in System Frontier. Of special note is the output format from the script.
The Custom Tool output can be basic text or HTML, which gives you great flexibility in the way your data is presented. The creator of the script may format the output appearance as desired.
Adding a Custom Tool

To create a Custom Tool, navigate to Tools > Create tool and fill in these fields:
Name
This is the name of the Custom Tool to be created.
Description
Being specific and informative with the text that you enter into your description will ensure the function of the tool is clearly understood.
Category
Choose the appropriate category for your tool, but be sure to not choose the preprocessor category unless the tool being created is going to run as a preprocessor to another tool. The categories are also found in the Lookup Data section of the Settings > Site page and can be modified there, if needed.
Script / Executable
The allowable file types include: .ps1, .vbs, .wsf, .js, .bat, .cmd, .sh, .exe, and other scripting engines can be loaded via a supported file type.
Click the Create button to generate the tool.
After creating the Custom Tool, you will be redirected to the Custom Tool (Edit) page where you can configure permissions and command-line arguments.
Editing an Existing Custom Tool

There are two ways to get to the Custom Tool (Edit) page: automatically, after clicking the Create button on the Custom Tool (Insert) page; or, by clicking on the name of a tool on the Custom Tools page.
To modify a Custom Tool, go to the Custom Tool (Edit) page and fill in the required fields:
Name, Description, Category, and Script / Executable
Look in the Adding a Custom Tool section above for information about these four fields.
File Hashes
Any time you save a script or executable the file hash is updated. This appears directly underneath the file name. File hashes are also updated when the management service is restarted or if you manually click the Update button on the Site > Settings page:

Be aware that any file changes on an untrusted management sever will be overwritten by the files on a trusted management server when a sync is performed from the Site > Management Servers page.
PowerShell Executable

Arguments
Arguments are the input variables needed by your script. You can create custom fields to use as inputs or use the built-in variables.
Custom Field Data Types
| Text | string |
| Number | int |
| CheckBox | string[] or int[] |
| ListBox | string[] or int[] |
| Date | datetime or string |
| MaskedText | string |
| URI | string |
| ListToCsv | string[] |
| FileContent | string (represents the path to the temp file) |
| MultiSelect | string[] or int[] |
| Table | string or int (represents the first column value) |
| HTML | string |
Built-in Variables
| {$targethostname} | Hostname is the name or IP address of a computer or device. Data type is string. |
| {$targetdomain} | The host’s Domain name (obtained from the System Frontier database and also visible on the Summary tab). Data type is string. |
| {$targetdescription} | The host’s Description (obtained from the System Frontier database and also visible on the Summary tab). Data type is string. |
| {$targetstatus} | Speed of the host’s CPU in megahertz (obtained from the System Frontier database and also visible on the Hardware tab). Data type is string. |
| {$targetenvironment} | The host’s Environment (obtained from the System Frontier database and also visible on the Summary tab). Data type is string. |
| {$targetmanufacturer} | The host’s Manufacturer (obtained from the System Frontier database and also visible on the Summary tab). Data type is string. |
| {$targetmodel} | The host’s Model (obtained from the System Frontier database and also visible on the Summary tab). Data type is string. |
| {$targetcpucount} | Number of CPUs for a host (obtained from the System Frontier database). Data type is string. |
| {$targetcpucores} | Number of CPU cores for a host (obtained from the System Frontier database). Data type is string. |
| {$targetcpuspeed} | Speed of the CPU in Megahertz for the host (obtained from the System Frontier database and also visible on the Hardware tab). Data type is string. |
| {$targetmemory} | The amount of Memory in gigabytes for the host (obtained from the System Frontier database and also visible on the Hardware tab). Data type is string. |
| {$targetipv4address} | The host’s IPv4 address (obtained from the System Frontier database and also visible on the Summary tab). Data type is string. |
| {$targetoperatingsystem} | The host’s Operating System (obtained from the System Frontier database and also visible on the Summary tab). Data type is string. |
| {$CurrentUsername} | The name of the user account that is currently running the Custom Tool. Data type is string. |
| {$CustomToolID} | The ID of the Custom Tool being run. Data type is string. |
| {$CurrentUserRoles} | The System Frontier Roles of which the user running the Custom Tool is a member. Data type is string[]. |
In the arguments field if you enter this information:
-ComputerName '{$targethostname}'
then System Frontier will pass as the -ComputerName variable the target computer name to the script. To clarify how this works, let’s see how a regular script is used and how to make it work as a Custom Tool.
A normal PowerShell script might be run from a command line like this:
.\Get-OperatingSystem.ps1 -ComputerName 'APPSRV01'
The actual script might look like this:
# Get-OperatingSystem.ps1 script example

# Get the parameters.
Param(
     [String]$ComputerName
)

# Get the operating system information
$operatingSystem = Get-WmiObject -Class Win32_OperatingSystem -ComputerName $ComputerName

# Output the information
Write-Output $operatingSystem
To turn it into a Custom Tool, you’ll just upload that script (Get-OperatingSystem.ps1) as your Script / Executable when you create the Custom Tool. You’d have this as your argument in the Arguments field:
-ComputerName '{$targethostname}'
The $targethostname variable will take its input manually when you run the tool from the Tools menu, or automatically when run it from a Container or Computer.
If you run the tool on a Container, the target will be all of the computers in the Container. The tool will run once for each computer in the Container.

If you run the tool on a single computer, the target will be that computer.

Likewise, if you want to use another built-in input variable, such as Model,
-ComputerName '{$targethostname}' -Model '{$targetmodel}'
then the computer’s model (as stored in the System Frontier database) will also be passed to the script. Custom fields can also be passed.
-ComputerName '{$targethostname}' -Port '{$Custom[PortNumber]}'
echo "Lifecycle will occur on {$Custom[LifecycleDate]}"
hostnamect1
cat /etc/*elease
Using Quotes in Arguments
If a variable’s real output might contain a value that would normally need to be surrounded by quotes, this can be accomplished like so: ‘{$targetoperatingsystem}’ (with single quotes for PowerShell and double quotes for most other languages).Do not use quotes around ListToCsv custom fields for PowerShell.
User Input Fields
If your script requires additional input that is not already built-in, you will need to use a Custom Field.
After your Custom Field is created, you can use it in any Custom Tool.
If your tool does need a custom input variable, go to the Custom Tool (Edit) page and click on the Modify button.

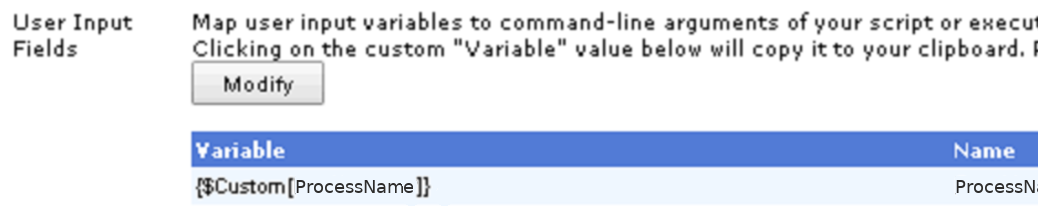
On the Custom Tool Input page, select the Custom Field that you have already created and click the Add button. You will then see the newly Mapped Input Field at the bottom:

Click the Done button and you are taken back to the Custom Tool (Edit) page. In the User Input Fields section and under Variable, you’ll see the Mapped Input Field.
To use this input variable in your script, make it available in your Arguments field:
-ComputerName '{$targethostname}' -ProcessName '{$Custom[ProcessName]}'
The items in the Arguments section will replace the token parameters in a script with the real values at run-time.
Through the magic of System Frontier, when you add a Custom Field (Mapped Input Field) to the Custom Tool a pre-built HTML form will be generated at run-time allowing the user to provide input into the new input variable.

Preprocessor
A preprocessor script, in the form of a separate Custom Tool, can be loaded and executed prior to running a Custom Tool. Use a preprocessor to dynamically populate input field values. If your Custom Tool has a ListBox field for services on a computer, for example, a preprocessor can be used to fill in the dropdown box options with a list of the services automatically so that you can select from them.
Don’t Allow Manual Hostname Input
Checking this option will require users to run the Custom Tool from the Tools tab of the computer. Users will not be able to enter a hostname for the input manually. This can be very helpful if you are running a preprocessor which populates an input field with data from a computer. For instance, if your preprocessor populates a ListBox with services running on a computer, it would be prudent to only allow the Custom Tool to run from the Tools tab of a computer because services may be different per computer and this avoids confusion.
ROI Reporting
Clicking on this link will take you to the ROI Report Settings page where you can configure the Return On Investment for the tool.
Permissions
Click the Modify button to open the Permissions Editor. Select the Roles that require access to this Custom Tool. You can choose more than one. A tool can only be accessed if the user has permission via their role.
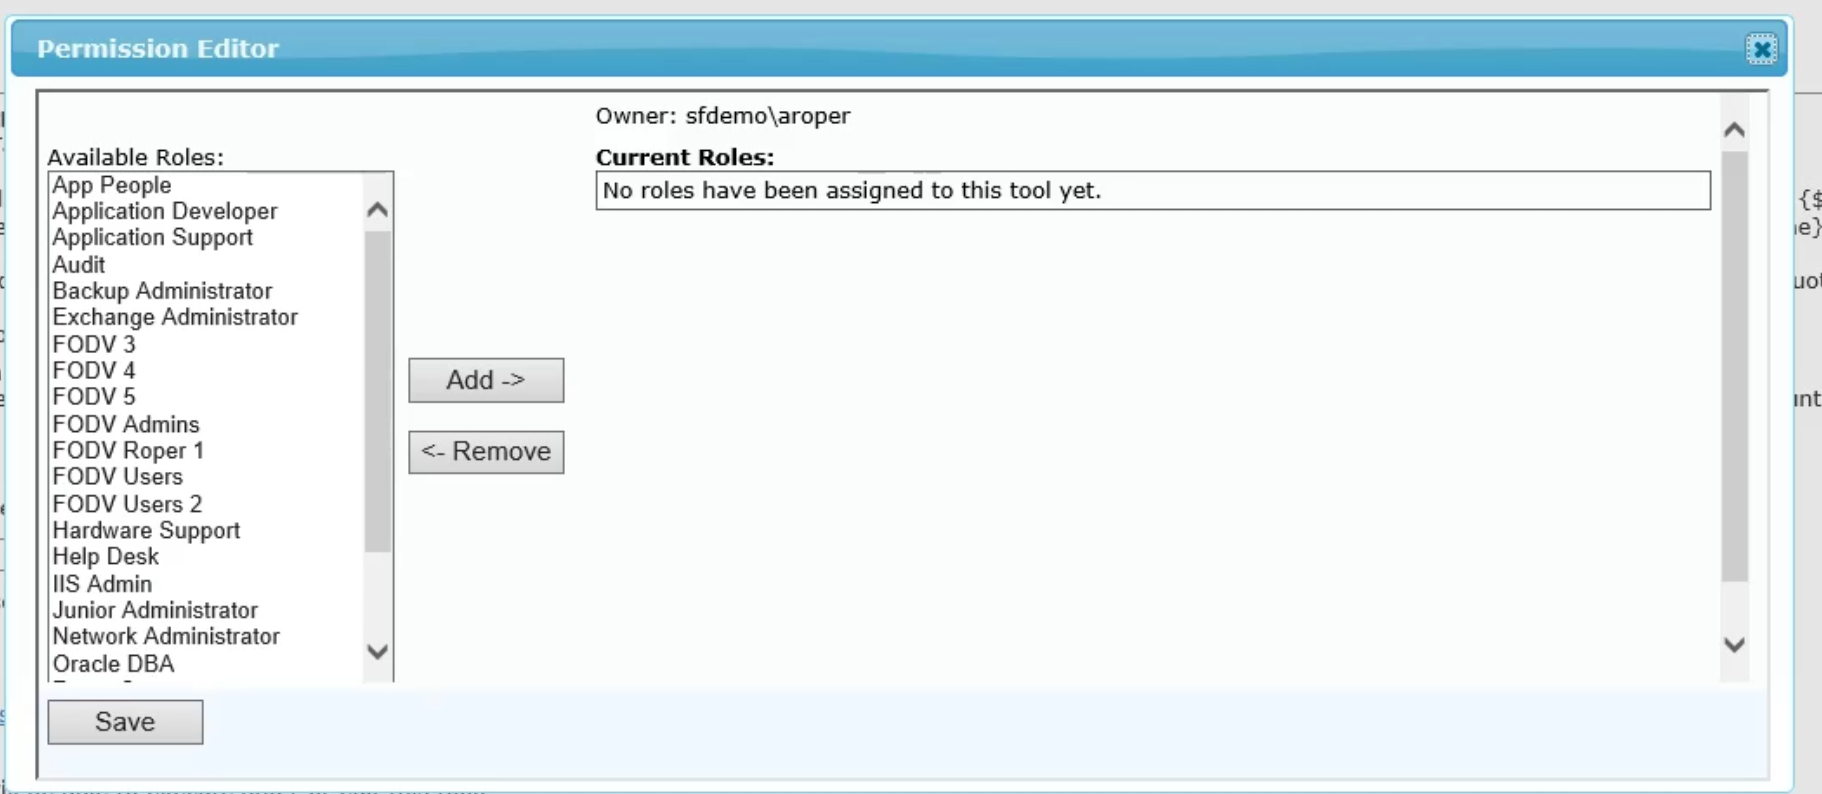
Additionally, you can allow others the ability to edit your tool in the Permissions Editor by checking the edit box next to the Role.

Disabled
Select the Disabled check box to disable the Custom Tool.

Credential Mapping
If your tool requires a specific Credential, select it here. System Frontier will use the default Credential based on this hierarchy:

Click the Save button to save your changes to the Custom Tool.
Deleting a Custom Tool
To delete a Custom Tool, click the Delete link at the bottom of the Custom Tool (Edit) page.
Running a Custom Tool
There are multiple ways to run a Custom Tool:
- in a Container
- on the Tools tab of a computer
- from the Tools > All tools page
- through the REST API

To run a tool from the Custom Tools page, find the Custom Tool that you wish to run, then click Open:

Note that any hostnames that are not already in System Frontier will be skipped. All targets that are managed, directly or indirectly, must be licensed.
Output
When you click the Run button for a Custom Tool, the job runs and the results are shown.

Results from tool executions will populate as data is received and a progress bar will update as well. You can leave and come back to the results at any time by going to Tools > My Jobs.
Multi-threaded Task Engine
When running against a list of machines, the System Frontier task engine will execute your script asynchronously to achieve faster throughput on larger lists. Your script does not have to implement anything special like multi-threading or PowerShell jobs to take advantage of this feature.
Custom Tools and the WriteCustomTool Permission
When a Role is given the WriteCustomTool permission, Role members are able to create and run their Custom Tools. They may also be able to edit and run Custom Tools that others have created, if other Custom Tool creators have added their Role to the permissions.
In the screenshot below, you can see the Custom Tools that the user can edit which are indicated by linked Names. If a tool does not have a clickable link then that means the user has only been granted access to run that tool.

Custom Tool Logging
Every time a Custom Tool is run, the data is logged. This includes the actual output of the tool. The only exception is that any data entered into a masked input field is not stored.
You can view previous results from Custom Tool runs in Reports > Audit History and also under the History tab of the computer.


Be sure to read the User Guide for more information.
